ArcPro 3.1 Installation Guide
This guide covers the steps to install and license ArcPro 3.1, set up the Python environment, and configure GPT on a development station.
Install .NET 6.0 Desktop Runtime
Download and install .NET 6.0 Desktop Runtime (v6.0.5) for Windows x64 from:
Install ArcGIS Pro 3.1
Download and install ArcGIS Pro 3.1 from the official Esri site:
https://www.esri.com/en-us/arcgis/products/arcgis-pro/overview
Firewall Exceptions
If ArcGIS Pro firewall exceptions are not configured on the server, follow this guide:
https://www.esri.com/en-us/arcgis/products/arcgis-pro/resources
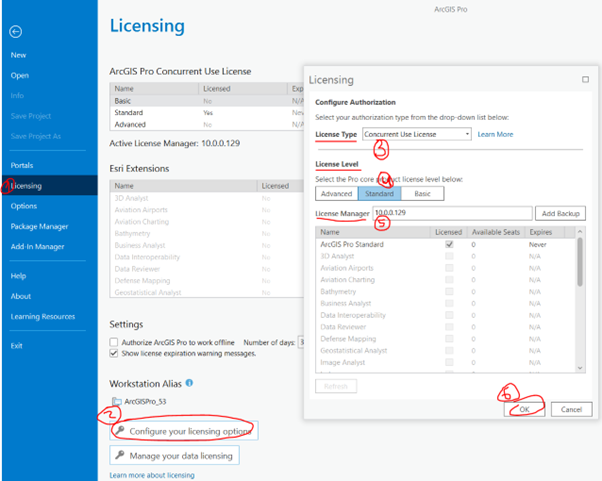
License ArcGIS Pro
Make sure you are on the same subnet as the license server (for example,
10.0.0.129). You may need to connect manually.Open ArcGIS Pro and complete the licensing steps.
Set Up the Python Environment
ArcPro manages Python environments and allows you to clone and modify them.
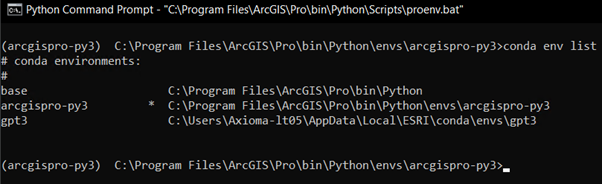
Follow this tutorial for cloning the base environment and switching to it in the Python Command Prompt:
https://pro.arcgis.com/en/pro-app/latest/arcpy/get-started/what-is-conda.htm
List the available environments using the command shown below.
Set Up the Python Interpreter in PyCharm
Open GPT3 in PyCharm.
Go to File -> Settings -> Project -> Python Interpreter.
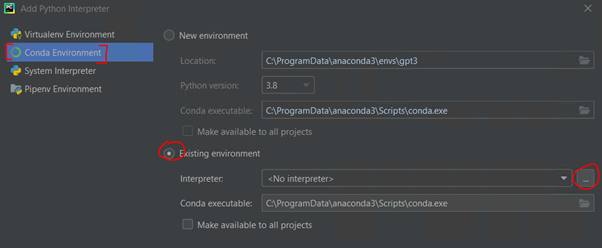
Select Add Python Interpreter.
Choose Conda Environment on the left panel.
Choose Existing environment.
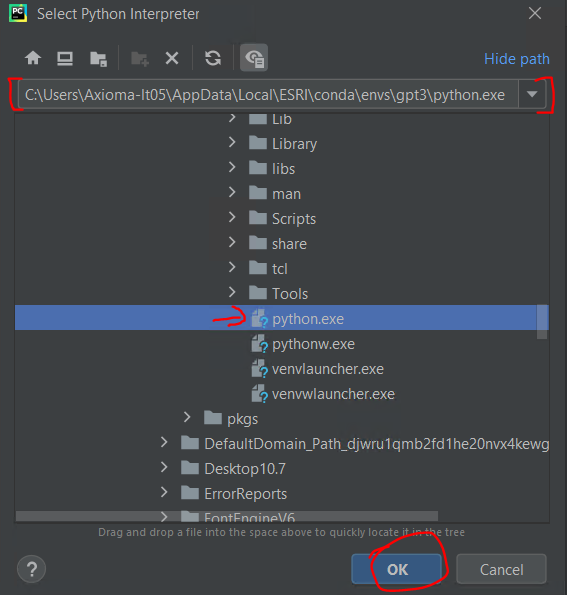
Browse to the directory of your cloned environment and select
python.exe.Click OK to confirm.
Manage Python Packages
Download the missing packages that PyCharm indicates are required.
Use the Anaconda Gallery and install the following packages using
conda-forgeif available:openpyxlpyyamlrequestsprettytablepyodbc
Configure the GPT Application
Configure the following
.batfiles for the GPT application:runprocess.batrunpreprocess.bat
These files are located in:
C:\ProgramData\axioma\gpt
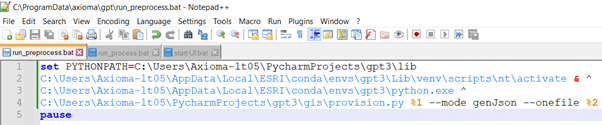
Edit
run_process.bat:Change the first row to the directory of GPT’s library.
Modify the environment created in step 5 and set the path to
activate.bat.Point to the
python.exeof the cloned environment.Change the directory of
provision.pyto GPT3’sprovision.py.

Edit
run_preprocess.bat:Follow the same steps as for
run_process.bat.
Final Setup
Verify that the GPT application is running by checking the logs and ensuring that the UI-SERVER is executing the correct GPT executable.
For additional support, refer to the official documentation or contact your administrator.